How To Take Apart Speakers with no Screws
By Robert Jones · 2021-08-10
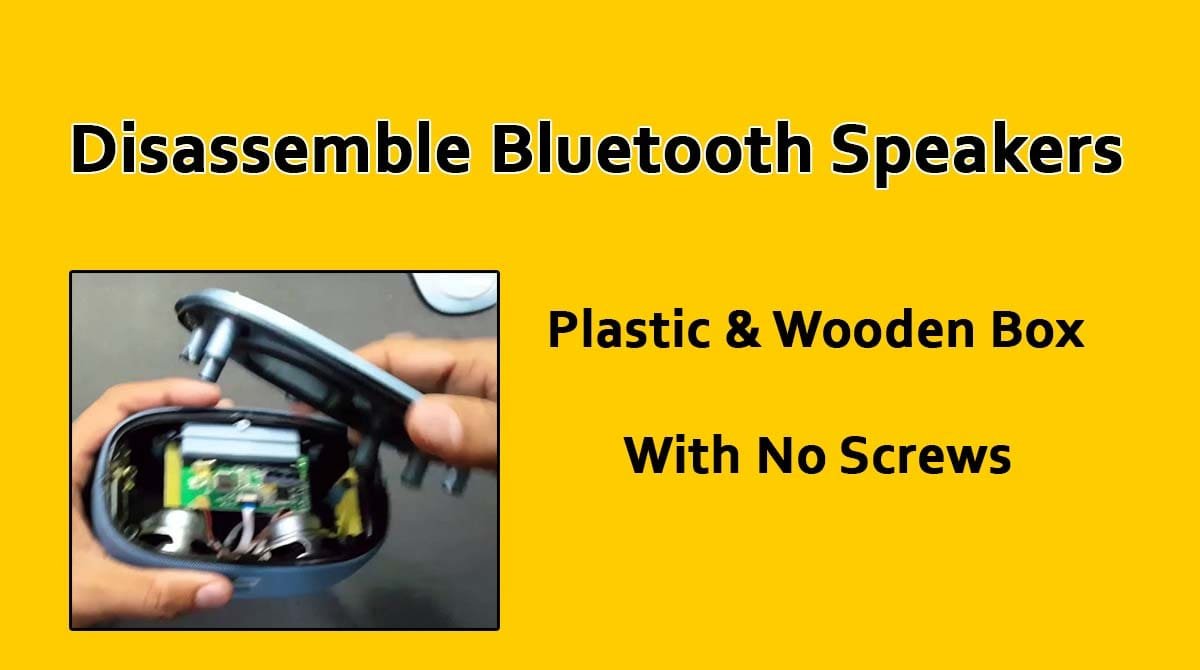
Right, listen up. You've got a speaker, and not a screw in sight? Don't despair! I'll walk you through how to get into those sealed units without turning them into a pile of mangled plastic. It's all about patience and the right tools, see.
Right, listen up. We've all been there, haven't we? You've got a shiny new bit of kit, or perhaps an old favourite that's packed up, and you fancy a peek inside. Easy enough if there are screws staring back at you, a quick twist and you're in. But then you encounter the smooth, unblemished case, not a screw head in sight. That's when the real fun begins, or the real frustration, depending on your patience levels. **Quick Verdict: It's a fiddly job, but with the right tools and a gentle touch, you can often get into screwless speakers without causing a right mess.** I've come across this a fair few times over my twenty-odd years kicking about with speakers and amps. From a budget soundbar I was reviewing for the magazine, to some rather pricey wireless bookshelf numbers that were playing up in the workshop. Manufacturers, bless 'em, sometimes seem to go out of their way to make sure you can't easily get into their gear. They want you out, see. They don't want you seeing the guts, or perhaps they're just going for that super-clean look. ### Who It's For: * Anyone with a dead speaker they're willing to risk trying to fix. * Curious tinkerers who just want to see how things are put together. * Folks needing to replace a driver or fix a loose connection on a glued-up unit. * Budget-conscious individuals trying to save a few quid on repairs. ### Who Should Skip It: * Anyone with a brand-new, expensive speaker still under warranty (you'll void it). * Those with limited patience or who are prone to smashing things when frustrated. * Anyone who expects to 'just open it up' and find a simple fix for complex electronic issues. * People who don't have the right tools, as you'll likely cause damage.  *How To Take Apart Speakers with no Screws — tested in the SpeakersMag workshop.* ## Why Do They Ditch the Screws Anyway? Good question, that. And usually, it boils down to one of two main reasons, or sometimes a bit of both. The first is pure aesthetics. You see it a lot with modern, minimalist designs – especially soundbars or compact Bluetooth speakers. They want a sleek, unbroken surface, no visible fasteners to spoil the lines. Fair enough, looks do matter to a lot of people. The second, and probably more common reason, is manufacturing cost and speed. Glue, clips, and ultrasonic welding are often far quicker and cheaper to apply on a production line than drilling pilot holes and screwing things together. Time is money, as they say, and when you're churning out thousands of units, those seconds add up. Plus, a good, well-applied adhesive can sometimes offer a better, more airtight seal than screws and gaskets, which is crucial for speaker performance, especially with smaller enclosures where every cubic centimetre counts. Air leaks are a killer for bass response, after all. Another thing I've noticed with some of the more portable, rugged designs is that glue and a tight seal offer better resistance against dust and splashes. Think about those outdoor Bluetooth speakers – a few screws here and there would create potential ingress points for water. A sealed unit, even if it's a pain to get into, makes sense for durability in less-than-ideal conditions. ## Essential Gear Before You Start (Don't Skimp Here) Before you go at your speaker with a screwdriver and a prayer, stop. Take a breath. Gather your kit. Having the right tools won't guarantee success, but it'll certainly reduce the chances of you turning your lovely speaker into a pile of mangled plastic and splintered wood. Trust me, I've learnt that the hard way. More than once. ### The Pry Tools First up, you need a good set of plastic pry tools. Forget the metal screwdrivers for this part unless you want to gouge chunks out of your cabinet. You know the sort I mean – the thin, wedge-shaped plastic bits used for opening phones, tablets, or car dashboards. They're relatively soft, so they flex and deform before your speaker does. A varied set with different thicknesses and angles is a godsend. You can pick these up online for a few quid, or at most electronics shops. ### Heat Gun (or a Decent Hairdryer) This is your secret weapon against stubborn glue. A proper heat gun is best, as it gives you much more control over temperature and direction. You're not trying to set the speaker on fire; you're trying to gently warm and soften the adhesive. A hairdryer can work for lighter jobs, but it's often not hot enough or precise enough for really tough glues. If you're going to be doing this sort of tinkering often, invest in a cheap heat gun – they're invaluable for all sorts of DIY tasks. ### Suction Cups Sounds daft, doesn't it? But a strong suction cup, like the kind used for lifting glass or screen repairs, can be incredibly useful. Sometimes a panel is only held on by a thin bead of adhesive, and a bit of suction combined with gentle prying can pop it off cleanly without needing to force anything. ### Thin Blade (for the brave) Sometimes, you'll find an incredibly tight seam where even the thinnest plastic pry tool can't get in. In these cases, a very thin, flexible metal blade – like a razor blade or a very thin hobby knife – can be used *with extreme caution* to just start a gap. Once you've got a tiny bit of separation, you can then switch to your plastic tools. I can't stress enough, be careful with these. They're sharp, and they'll scratch your speaker if you're not delicate. ### Magnifying Glass or Head Loupe When you're trying to spot those tiny seams, clips, or hidden fasteners, a bit of magnification helps. My eyes aren't what they used to be, and I often use a head loupe for this sort of intricate work. It saves a lot of squinting and makes sure you're not just guessing where to apply force. ### Some Common Sense & Patience This isn't a race. You're dismantling something, not trying to win a prize for speed. Rushing will lead to broken clips, scarred enclosures, and likely a ruined speaker. Take your time. Work slowly. If something isn't budging, stop and reassess. There's usually a logical reason why it's stuck. ## The Gentle Art of Prying and Persuading Right, tools in hand, let's get down to it. You've got your speaker in front of you. First job: give it a good visual inspection. Run your fingers along every edge, every panel. Look for any faint lines, any subtle changes in texture where two parts meet. That's your seam. Often, you'll find the front baffle (the bit with the drivers) or the rear panel is the most likely candidate for removal. ### Finding the Seam This is where your magnifying glass comes in handy. You're looking for the tiniest gap. Sometimes it's almost invisible. Once you think you've found it, take one of your thinner plastic pry tools. Gently try to insert the very edge into the seam. Don't push hard. You're not trying to force it open with brute strength at this stage. Just a gentle wiggle, trying to find a purchase. If it feels like it's going nowhere, or the plastic tool starts bending too much, that's your cue for the heat gun. ### Warming Things Up Grab your heat gun. Set it to a low-to-medium setting initially. Hold it a few inches away from the seam and keep it moving. You're trying to heat the *entire seam area* evenly, not just one spot. If you focus too much heat in one place, you'll melt the plastic, blister the finish, or damage internal components. Work your way along the seam, back and forth. You're aiming to soften the adhesive, not vaporise it. Every 20-30 seconds, put the heat gun down and try your plastic pry tool again. You'll often feel a noticeable difference as the glue softens. You might hear a slight crackling or a gentle pop as the adhesive starts to give way. This is good! It means you're making progress. Keep applying heat and prying gently, working your way around the panel. ### The "Pop" Method Sometimes, especially with smaller Bluetooth speakers, the entire front or rear grille might be held on with adhesive and a few clips. Once you've softened the glue around the edge with heat, you can sometimes use a strong suction cup on the centre of the panel. Apply a bit of upward pressure with the suction cup, and gently pry around the edges with your plastic tools. With a bit of luck, the whole panel will 'pop' off, usually releasing from a series of internal clips. ### Hidden Fasteners and Grilles Now, not all screwless speakers are *actually* screwless internally. Many will have a removable grille or outer skin that's glued or clipped on, revealing screws underneath. This is common with some bookshelf speakers or soundbars. The grille might be held on by hidden magnets (easy to remove with a gentle pull), or sometimes it's clipped and glued. Once that outer layer is off, you might find a whole array of proper screws holding the drivers and cabinet together. Always check thoroughly before you assume everything is glued solid. I recall a set of rather nice KEF Q-series speakers a few years back. The grilles were magnetic, but the drivers themselves were held in place by what looked like perfectly smooth trim rings. Turns out, these rings were held by clips and a tiny bead of glue, and once popped off, they revealed the screws for the drivers. Always look for the next layer! ## What to Do When It's Open (The Guts) So, you've managed to get inside. Well done! Now what? Don't just start yanking wires. Take a moment. What were you trying to achieve? Were you checking a loose connection? Replacing a driver? Just having a nose? Whatever it is, proceed with caution. ### Replacing Drivers If a driver is faulty, you'll usually find it held in by screws once the front baffle is off. Note down the model number of the driver, its impedance, and physical dimensions. Try to source an exact replacement if possible. If not, you'll need to find one with very similar characteristics to maintain the speaker's original sound balance. Just because a driver fits the hole doesn't mean it will sound right. Desolder the old driver's wires, making sure to note which is positive and which is negative (red is usually positive, black negative, but always double-check if marked). Solder in the new driver. Be neat with your soldering; cold joints are a common cause of poor sound or intermittent issues. ### Fixing Loose Wires or Crossovers Sometimes, a speaker just stops working, or sounds intermittent. Often, it's a simple loose wire to the driver or on the crossover board. Inspect all connections carefully. Give wires a gentle tug. Look for any discoloured components on the crossover, which could indicate overheating. If you spot a dry solder joint, carefully re-solder it. If a component like a capacitor or resistor looks burnt or bulged, that's a trickier fix and might need an electronics expert. ### Repairing Enclosures If you've managed to crack a plastic enclosure getting in, or separated wood panels, you'll need to repair it properly. For plastic, a good plastic-specific adhesive or even some plastic welding can work. For wood, good old wood glue and clamps will do the trick. Ensure any repairs are airtight, especially if it's a sealed enclosure, otherwise, you'll ruin the bass response. ## Putting It All Back Together (The Reverse Fiddly Bit) This is often easier than getting in, but still requires care. If you've broken any clips, or if the original adhesive was particularly weak, you might need to use some fresh glue. For plastic-to-plastic or plastic-to-metal joints, a good quality adhesive like a suitable epoxy or even a strong contact adhesive can work wonders. If it's a wooden cabinet, wood glue is your friend. Apply glue sparingly. You don't want it oozing everywhere. Make sure everything aligns perfectly before pressing into place. If clips were involved, ensure they snap back in securely. You might need to clamp the panels gently until the glue cures fully. Don't rush this stage; a poorly sealed cabinet will sound rubbish. ## A Word on Warranties and Risks It goes without saying, but it needs saying: if your speaker is still under warranty, and you go prying it open, you'll almost certainly void that warranty. Manufacturers are pretty savvy about this sort of thing. So, weigh up the cost of a repair or replacement against your desire to peek inside or attempt a DIY fix. For a £50 Bluetooth speaker, it might be worth the risk. For a £500 active monitor, perhaps not so much unless you're really confident or it's well out of warranty. There's also the risk of damaging the speaker beyond repair. Plastic enclosures can snap, finishes can blister, drivers can be punctured. Go in with your eyes open, knowing that there's a chance you'll make things worse before they get better (or ever). That said, there's a huge satisfaction to be had from successfully repairing something you thought was dead. ### Comparison of Disassembly Methods: | Method | Pros | Cons | Best For | | :------------------- | :---------------------------------------- | :--------------------------------------------------------- | :------------------------------------------- | | **Screws** | Easy, non-destructive, repeatable. | Can look clunky; potential for stripped heads. | Hi-Fi speakers, older designs, repairability. | | **Clips & Adhesive** | Clean aesthetics, fast manufacturing. | Difficult to open, risk of breaking clips, often requires heat. | Soundbars, portable speakers, modern designs. | | **Ultrasonic Welding** | Very strong, dust/waterproof, super clean. | Virtually impossible to open non-destructively; major damage likely. | Rugged outdoor speakers, sealed components. | ## FAQ - Getting Inside Without Screws ### Q: What if I can't find any seams at all? A: It's rare, but some very cheap or very expensive (think highly sealed) units might appear seamless. Double-check under any rubber feet, labels, or decorative trim pieces. Sometimes screws are hidden there. If truly seamless, it's likely ultrasonic welded or very heavily glued. You'll need serious heat and patience, and potentially risk more damage. ### Q: Can I use a regular hairdryer instead of a heat gun? A: For light adhesives or small plastic parts, a powerful hairdryer *might* work. However, a heat gun gets significantly hotter and allows for more precise application of heat, which is often crucial for softening tougher glues without melting the surrounding material. A hairdryer will take much longer and might not be effective. ### Q: What kind of glue should I use to reassemble it? A: It depends on the material. For plastic-to-plastic, a good quality plastic adhesive or an epoxy designed for plastics is best. For wood, use wood glue. If you're joining different materials, a strong multi-purpose epoxy or contact adhesive will often do the trick. Ensure the glue is suitable for the materials and forms an airtight seal if required. ### Q: What are the biggest risks when taking apart screwless speakers? A: The biggest risks are cosmetic damage (scratches, melting plastic), breaking internal clips or plastic tabs, damaging driver cones during disassembly, and shorting out electronics if you're not careful. Always unplug the speaker and discharge any capacitors before working on electronics. ### Q: My speaker is made of metal. Is it different? A: Metal enclosures can also be glued or have hidden fasteners. The principle of finding seams and applying heat to soften adhesives still applies. However, metal dissipates heat differently, so you might need to apply heat for longer. Be careful not to warp thin metal panels with excessive heat or force. Metal is also harder to repair cosmetically if scratched or dented. ## Final Word Getting into a speaker that stubbornly refuses to give up its secrets can be a frustrating old business. Manufacturers make it tough, sometimes for good reason, sometimes just to save a few quid. But with the right tools, a bit of knowledge, and a healthy dose of patience, it's often a solvable puzzle. Remember, go gentle, keep the heat moving, and always think twice before applying brute force. There's a real satisfaction in peering inside, understanding how it's put together, and perhaps even bringing a dead speaker back to life. Good luck, and try not to break anything you can't put back together!